
Valentine's day is Monday. Declare your flame all over again. Beverly , my second White Knight shares a tutorial to make a statement (and a declaration) out of a plain white shirt. How could "He" not love this too?

~~~~~~~~~~~~~~~~~~~~~~~~~~~~~~~~~~~~~~~~~~~~~~~~~~~~~~~~~~
Hello Atelier Caroline Readers!I'm excited to meet you!
My name is Beverly and I blog over at Flamingo Toes.

I love crafting, sewing, cooking - and I'm willing to try just about anything.
I love making things that are fun and whimsical - and this tutorial is just that!
I wanted to make a shirt for Valentine's Day. Something sweet and
"Valentine-y" but not something that I was limited to wear only for a few
days once a year. (I don't have any problem with that - I just don't have
the closet space to store clothes for every holiday.) I wanted something
subtly Valentine-y. Yes. I just said that.
Here's what I came up with!

My sweet friend Emily, from Frilly Details had sent me a tutorial idea on the request page back before Christmas - which I loved but I just didn't have time to do. It was for this cute Christmas shirt at Target.

It was a plain white t-shirt with a white ribbon or chiffon ruffled and
stitched on for the words. Nice and simple but oh so cute!
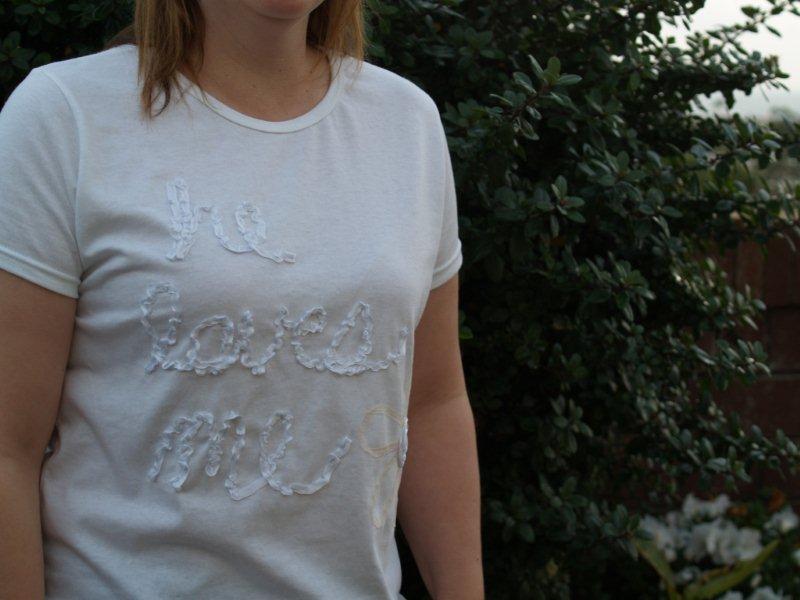
I switched it up a bit and went with the whole "He Loves Me, He loves me
not, he loves me" idea with a flower for Valentine's Day - only I shortened
it. Because I don't have to guess, I know he loves me. :)
Ready for a tutorial?
You'll need:
. T-shirt
. Assorted Ribbon. I used about 7 yards for the white (definitely an
estimate) and maybe 2 yards for the cream on the flower
. Freezer paper

This is a pretty similar process to my Ribbon
Flower T-shirt. You probably haven't seen that though because I think
maybe 11 people were reading my blog then. :) Maybe less.
Start by ironing on a piece of Freezer paper to the wrong side of the front
of your t-shirt. Place the shiny side of the freezer paper down on the
fabric and iron it - it will stick to the fabric.
This is to stabilize our shirt. If we didn't do this, when we sewed the
ribbon on the t-shirt would stretch out and look funky.

PS - this was my last piece of freezer paper and I am now out. That is on
par with running out of milk in this house. Must. Buy. More.
Turn your shirt right side out. Draw out what you would like to write. I
wrote "he loves me" and drew a flower. But it would also be cute to write
out "love" in different languages, or whatever you want really!

For a marking pen - I used a Marvy Disappearing Ink marker that I picked up
at a quilt shop. The marker says that the ink disappears within 2 - 14 days.
Um. Not in my case. More like 2 - 14 minutes. Not really - but it starts
disappearing within an hour or two. I like that it disappears so completely
- but if I am not going to finish my project on the day I've started - I
don't use it. I switch to the blue Mark-B-Gone that I get at Joann's. That
one stays longer but is also harder to get out and sometimes it returns. So
neither are ideal. If you have any suggestions, I'd love to hear them!
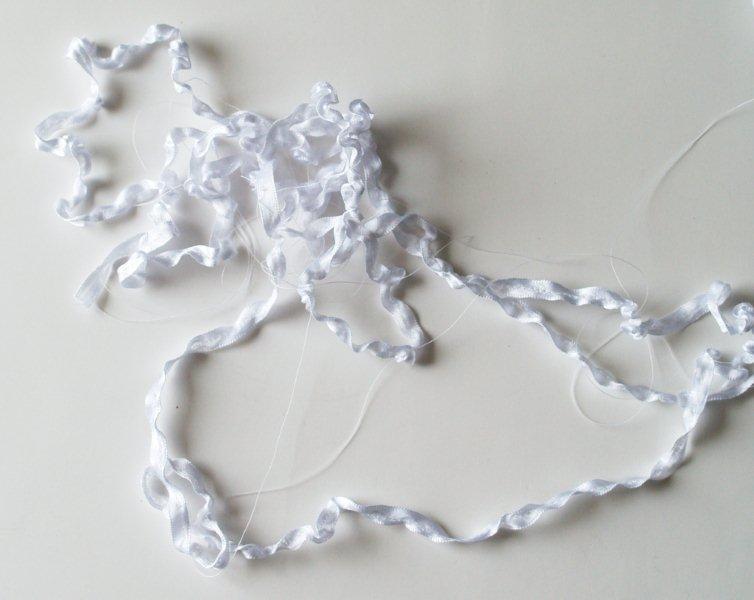
Ok - onto sewing. I started with a 10 yard roll of white 3/8" ribbon. I used
about 3/4 of it I think.
Run a gathering stitch down the center of the ribbon. Put your sewing
machine on the longest stitch length and sew down the center, leaving long
ends at the beginning and end of the thread.
I stopped and started my stitch a few times since the ribbon piece was so
long. I didn't want my gathering thread to break in the middle. Hold the
ribbon and pull gently on one of the ends of the thread (either the top or
the bottom, it doesn't matter which). This will gather up the ribbon. You
don't want the gathers too tight for this.
Start with the end of the ribbon and your first letter. Turn the ribbon
under just a bit so the cut end is covered by the ribbon. Begin sewing your
ribbon on, following your marked lines.
Fold the ribbon under at the end of the word, like you did at the beginning.

Continue sewing your ribbon onto your other words. Your shirt will become
pretty wrinkled because of the freezer paper. Just make sure it doesn't
pucker under the ribbon. Also make sure you are pulling the rest of the
shirt out of the way and you don't sew over it accidentally. Ahem.
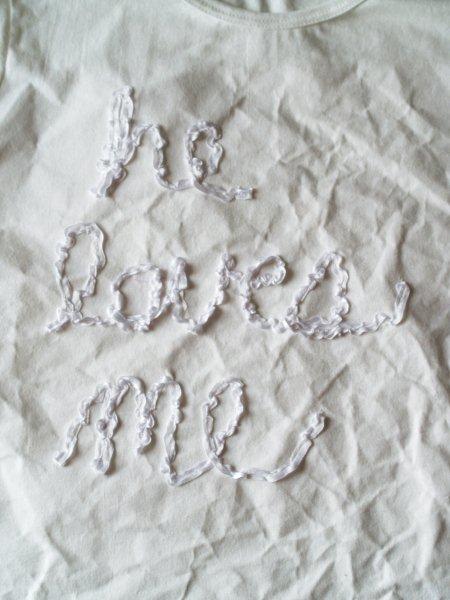
See? Wrinkly. :)
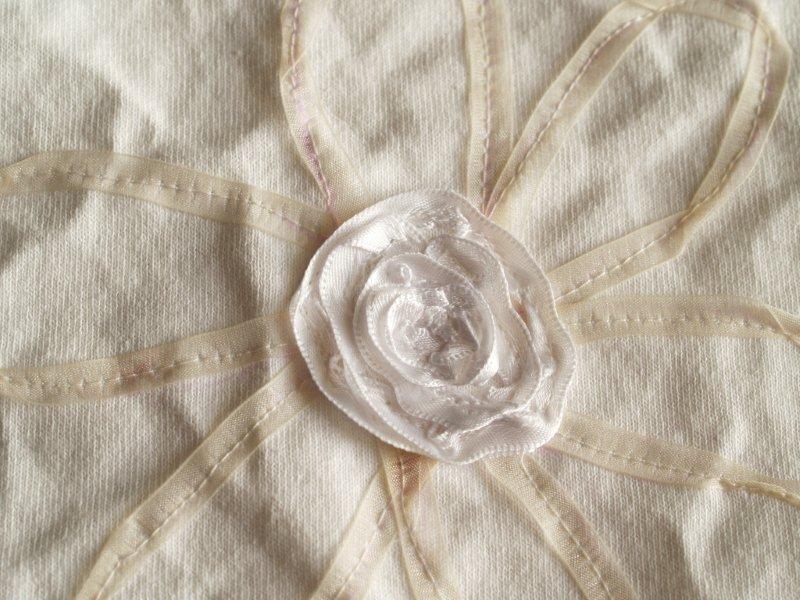
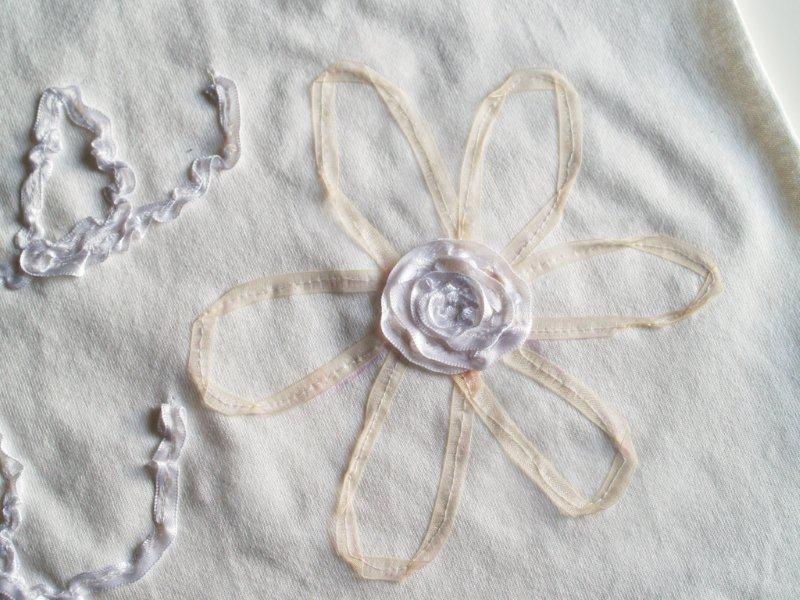
I wanted the petals of the flower to be just a bit different than the
writing. I used a sheer ivory 3/8" wide ribbon.
Follow the marked lines for this as well, but at the curves, turn the ribbon
at angles to follow the lines.
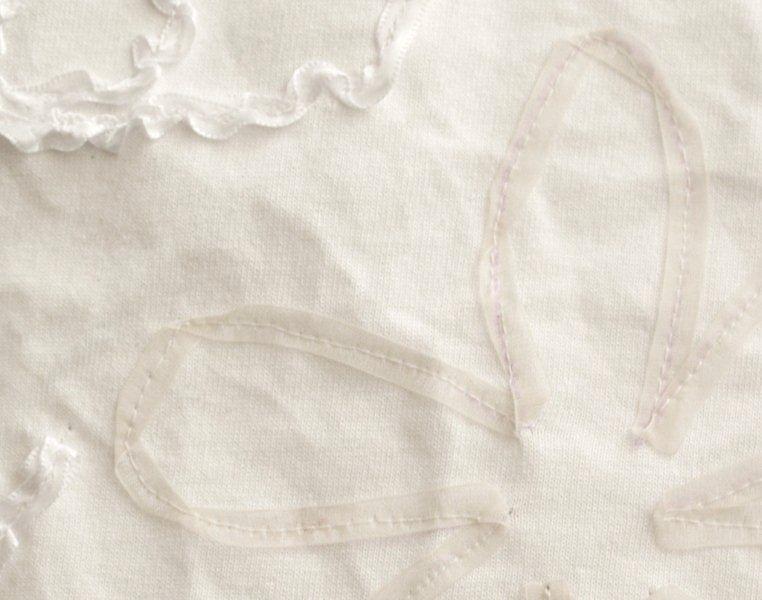

For the center of the flower, switch back to the ruffled white. Sew that in
the center of the flower in a spiral, so that your spiral gets smaller and
smaller and covers the center of the flower.
Turn your shirt wrong side out - it's time to remove all the freezer paper.
Start by tearing off the big pieces around the edges. Work closer and closer
to your stitching. When you get to the stitching, pull gently - if you pull
too hard you can pull out or distort your threads. It helps to place your
finger on the seam and pull gently with your other hand. This will help hold
the stitching in place.

Once you have all the freezer paper off, turn it right side out and press
out all your wrinkles.

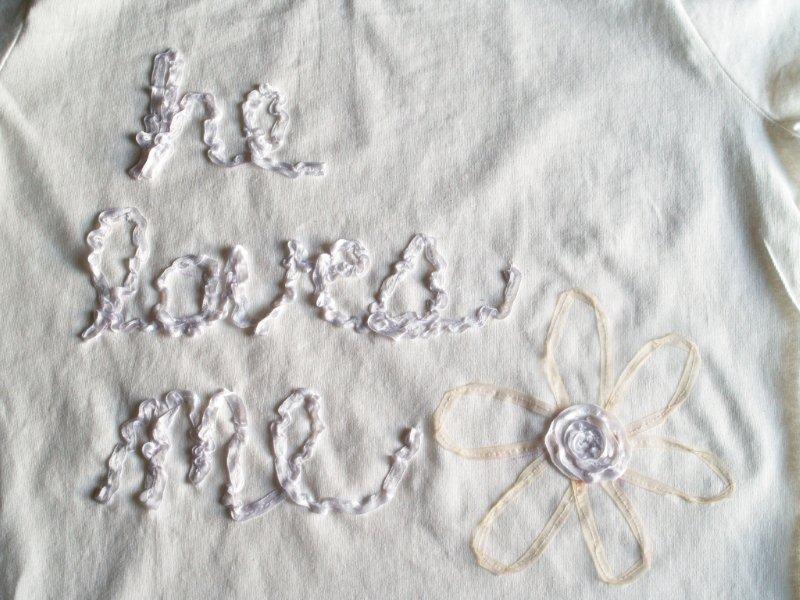
Now you have a cute shirt for Valentine's Day that you can wear year round!

What do you think? Subtly Valentine-y? ;)
I'd love for you to stop by Flamingo Toes and say 'Hi!" ;)
You can check out my projects here - there are tutorials for
home decor, jewelry, holiday things - and lots more!
Thank you so much for having me over Caroline!
~~~~~~~~~~~~~~~~~~~~~~~~~~~~~~~~~~~~~~~~~~~~
~~~~~~~~~~~~~~~~~~~~~~~~~~~~~~~~
~~~~~~~~~~~~~
A great idea and a versatile technique that can be adapted to many other projects.
Very Valentine, and very chic shirt.
Many thanks Beverly
Very Valentine, and very chic shirt.
Many thanks Beverly

Very cute idea!
ReplyDeleteThanks so much for having me over Caroline!! :)
ReplyDelete